WordPressの記事中に内部リンクと外部リンクを出力するショートコード

テーマ作成時に参考にした記事を実例とともにご紹介するシリーズです。今日はタイトルのまんまですが、ブログの本文中に外部リンクや内部リンクを貼る際、ただの文字列リンクではなくブログカードのような外観にするためのショートコードを(他ブログを参考に)作成しましたので、ご紹介します。
完成形
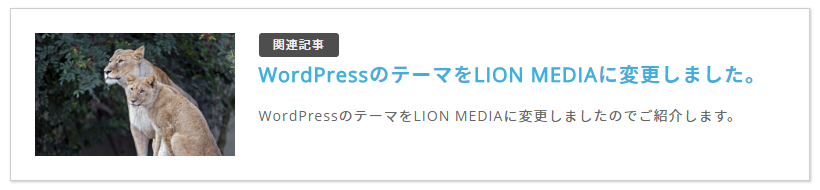
まずは完成形から。当ブログでは以下のような形で表示されるように調整しています。
内部リンク
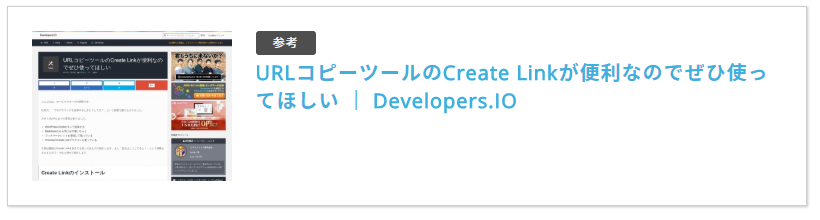
外部リンク
参考にしたサイト
検索するとたくさんの記事が出てくるのですが、個人的に
- コードがシンプル
- コードが分かりやすい(理解しやすい)
- プラグインを使わない
ものを選択しました。内部リンクは以下の記事を参考にしました。
【WordPress】コピペで実装ブログカードの作り方【プラグインなし】|macoblog
この記事では、WordPressで内部リンクのブログカード化を誰でも簡単に実装する方法(作り方)を解説しています。はてなブログみたいなお洒落なブログカードを簡単に作りたい方は参考にどうぞ。【記事の内容】「プラグインなしでブログカードを実装する方法」「WordPressでブログカードを自作する手順」
https://macoblog.com/wp-blogcard-notplugin/

外部リンクは以下の記事です。
R7.5.6追記
残念ながらサイトが閉鎖されていましたのでリンクを削除しました。
内部リンクのショートコード
上記の記事で紹介されている通りなんですが、まずはfunctions.phpに以下を追加します。
// 内部リンクのショートコード
function ltl_get_the_excerpt($post_id){
  global $post;
  $post_bu = $post;
  $post = get_post($post_id);
  $output = get_the_excerpt();
  $post = $post_bu;
  return $output;
}

function shortcode_internal_link($atts) {
    extract(shortcode_atts(array(
        'url'=>"",
        'title'=>"",
        'excerpt'=>""
    ),$atts));

    $id = url_to_postid($url);

    $img_width ="277";
    $img_height = "171";
    $no_image = 'https://neatdesignjournal.com/wp-content/themes/Sorairo/images/no_image.png';

    // タイトルを取得
    if(empty($title)){
        $title = esc_html(get_the_title($id));
    }
    // 抜粋文を取得
    if(empty($excerpt)){
        $excerpt = esc_html(ltl_get_the_excerpt($id));
    }
    // アイキャッチ画像を取得
    if(has_post_thumbnail($id)) {
        $img = wp_get_attachment_image_src(get_post_thumbnail_id($id),array($img_width,$img_height));
        $img_tag = "<img src='" . $img[0] . "' alt='{$title}' width=" . $img[1] . " height=" . $img[2] . " />";
    }else{
    $img_tag ='<img src="'.$no_image.'" alt="" width="'.$img_width.'" height="'.$img_height.'" />';
    }

    $nlink .='
<div class="internal_link">
    <figure class="internal_link_thumbnail"><a href="'. $url .'">'. $img_tag .'</a></figure>
    <div class="internal_link_content">
        <div class="internal_link_title"><a href="'. $url .'">'. $title .'</a></div>
        <div class="internal_link_excerpt">'. $excerpt .'</div>
    </div>
</div>';

    return $nlink;
}

add_shortcode("il", "shortcode_internal_link");
20行目で出力される画像の横幅を、21行目では高さを指定しています。また、22行目ではアイキャッチ画像が設定されていない場合に表示される画像へのパスを記載しています。41行目からは実際に出力されるHTMLが記述されています。この辺は元のコードからオリジナルに変更していますので、参考記事を参照してご自身のブログに合うように変更してください。ご参考までに当ブログで設定しているCSSを掲載します。
.internal_link {
    margin-bottom: 48px;
    padding: 24px;
    border: 1px solid #cecece;
    background-color: #ffffff;
    display: flex;
    box-shadow: 1px 1px 2px #cecece;
}

.single .post_body figure.internal_link_thumbnail {
    margin-right: 24px;
    margin-bottom: 0;
    padding: 0;
    width: 200px;
    background: transparent;
}

.internal_link_content {
    flex: 1;
}

.internal_link_title {
    font-size: 2.0rem;
    font-weight: 600;
    line-height: 1.4;
    margin-bottom: 16px;
}

.internal_link_title:before {
    font-size: 1.2rem;
    color: #f8f8f8;
    font-weight: 400;
    text-align: center;
    margin-bottom: 4px;
    padding: 4px;
    width: 8.0rem;
    background: #4e4e4e;
    display: block;
    content: '関連記事';
    box-sizing: border-box;
    border-radius: 3px;
}

.internal_link_excerpt {
    font-size: 1.4rem;
    color: #666666;
    line-height: 1.6;
}
外部リンクのショートコード
続いては外部リンクです。これも上記の記事を参考に、当ブログでは以下のようにしました。
// 外部リンクのショートコード
function shortcode_external_link($opt, $content = null) {
    /* デフォルトの設定 */
    $width = 300; // サムネイルの横幅
    $class = 'external_link'; // 全体を覆うclass
    $text = 'リンク'; // アンカーテキストがなかった時のテキスト
    /* デフォルトの設定ここまで */
    if(!empty($opt['url']) && preg_match('/^(https?|ftp)(://[-_.!~*'()a-zA-Z0-9;/?:@&=+$,%#]+)$/', $opt['url'])) {
        if(!empty($opt['width']) && preg_match('/^[0-9]+$/', $opt['width'])) $width = $opt['width'];
        $height = round($width * 0.616);
        if(!empty($content)) $text = esc_attr($content);
        if(!empty($opt['class']) && preg_match('/^[a-zA-Z0-9 -_]+$/', $opt['class'])) $class .= ' '.$opt['class'];

        $str = '<div class="'.$class.'"><figure class="external_link_thumbnail"><a href="'.$opt['url'].'" target="_blank"><img src="http://s.wordpress.com/mshots/v1/'.rawurlencode($opt['url']).'?w='.$width.'" alt="'.$text.'" width="'.$width.'" height="'.$height.'" /></a></figure><div class="external_link_content"><div class="external_link_title"><a href="'.$opt['url'].'" target="_blank">'.$text.'</a></div>';
        $str .= '</div></div>';
        return $str;
    }
}
add_shortcode('el', 'shortcode_external_link');
ご紹介した記事では抜粋文も取得するようになっていますが、そこまですると見た目が悪いのでそこはばっさりカットしました。CSSは以下のようにしました。
.external_link {
    margin-bottom: 48px;
    padding: 24px;
    border: 1px solid #cecece;
    background-color: #ffffff;
    display: flex;
    box-shadow: 1px 1px 2px #cecece;
}

.single .post_body figure.external_link_thumbnail {
    margin-right: 24px;
    margin-bottom: 0;
    padding: 0;
    width: 200px;
    background: transparent;
}

.external_link_content {
    flex: 1;
}

.external_link_title {
    font-size: 2.0rem;
    font-weight: 600;
    line-height: 1.4;
    margin-bottom: 16px;
}

.external_link_title:before {
    font-size: 1.2rem;
    color: #f8f8f8;
    font-weight: 400;
    text-align: center;
    margin-bottom: 4px;
    padding: 4px;
    width: 6.0rem;
    background: #4e4e4e;
    display: block;
    content: '参考';
    box-sizing: border-box;
    border-radius: 3px;
}
見た目のデザインが内部リンクと同じなので、記事タイトルの前に付けたアイコンを「関連記事」と「参考」にすることで変化を付けました。
執筆時
ブログ記事を書く時に、Google Chromeの拡張機能であるCreate Linkを使って楽しています。
内部リンクは
[il url="%url%"]外部リンクは
[el url="%url%"]%text%[/el]と設定し、ワンクリックでコードを取得できるようにしています。 ※「[」と「]」は半角です。
最後に
いかがでしたでしょうか。ここでは簡単なご紹介しかしていませんので、詳細は参考記事を必ずご確認ください。特にfunctions.phpに手を加える時はご注意ください。コードを間違ったり余計な余白とか改行が入るとエラーになって画面真っ白頭真っ白状態に陥りますので、バックアップを取ってから臨むことをお勧めします。